

How custom-fabricated abutments are designed, indicated, and selected for a case
A custom-fabricated abutment is designed in CAD software around one patient's implant position, gingival contour, and planned restoration, then milled to that specific design rather than selected from a catalog of preset shapes and sizes. The starting point for that milling is a pre-milled abutment blank, and the only part of the blank that is actually pre-milled is the connection geometry that engages the implant. Everything above it, including the emergence profile, margin line, and abutment height, is designed against the patient's scan data and milled for that case. The blank and the custom abutment are therefore not two separate options; one is the starting material for the other. The real alternative to a custom-fabricated abutment is a prefabricated stock abutment, which comes in a fixed range of shapes and sizes and can only be adjusted within the limits of that preset geometry.
The practical question for a case, then, is not whether "custom" sounds preferable to "stock." It is which fabrication route a given case actually needs, and what that route requires of the digital workflow producing it. A textbook posterior site with thick tissue rarely justifies the added design and production time of a custom part. An anterior case with a thin biotype, a coordinated multi-unit emergence profile, or an implant that did not land exactly where the plan called for it, on the other hand, is usually where that added step earns its cost. Working through the workflow, the material options, and the indications in order gives a clearer basis for that decision than treating "custom" as a single, uniform upgrade.
The CAD/CAM workflow behind a custom fabricated abutment
Producing a custom fabricated abutment follows the same core sequence regardless of case complexity:
- Implant-position record: An intraoral scan body or a conventional impression coping captures implant position once osseointegration has been confirmed.
- Digital model: That scan data, together with the surrounding soft tissue contour, becomes the digital model the rest of the case is built on.
- CAD design: The designer sets margin position around the full circumference of the abutment, shapes the emergence profile against the recorded tissue contour, and corrects the angulation of the restorative platform where the implant was not placed on the ideal axis for the crown.
- CAM milling: A titanium or zirconia blank, chosen according to the material plan, is milled to the finished design on precision CNC equipment.
- Finishing and seating: The milled part is finished and inspected before it reaches the clinic, where it is seated at the torque value specified by the implant manufacturer.
Digital scanning has made this workflow the norm, though a conventional impression executed well remains a valid input at the front end of the same process. What changes between digital and analog capture is how the position gets recorded, not what the CAD and CAM stages then do with it.
What a custom abutment controls that a stock abutment does not
The difference between a custom fabricated abutment and a prefabricated stock abutment matters most at the margin and in the emergence contour. Because a custom abutment is milled from a pre-milled blank whose only preset feature is the implant connection, the designer can place the margin at a different depth at every point around the abutment, following the natural scallop of the gingiva rather than a single flat plane, and shape the tissue emergence profile to the patient's own contour. A stock abutment arrives with its margin and emergence profile already set. It can be reshaped, but only within the limits of its manufactured shape and geometry, so it cannot follow a contour that varies around the full circumference of the case.
For a single posterior implant with a fairly uniform tissue cuff, that difference rarely changes the outcome enough to matter. A central incisor with an irregular gingival scallop, or a multi-unit case where the emergence profile of one abutment has to read as a continuous line with its neighbors, is where the additional control a custom design provides becomes the deciding factor. Choosing between the two is a question of how much the case's geometry deviates from a stock abutment's preset form, not a question of which option is categorically superior.
Material selection within the fabrication workflow
Material choice is made during CAD design, since the mill or the CAM software needs to know which blank it is cutting from. The three options used in custom fabrication carry distinct trade-offs:
| Material | Best suited for | Key trade-off |
|---|---|---|
| Titanium (Grade 5, Ti-6Al-4V) | Cases where occlusal load is the primary concern | Strong fatigue resistance and a long biocompatibility track record, but its gray tone can show through thin tissue |
| Zirconia | Cases where esthetics dominate the decision | Tooth-colored with a favorable soft tissue response, but solid zirconia milled against a titanium implant raises wear concerns under heavy lateral load |
| Ti-base hybrid | Most modern anterior custom fabrications | Combines a titanium-to-titanium connection at the implant platform with zirconia esthetics above the tissue, removing the trade-off between the other two |
The Ti-base hybrid pairs a custom-designed zirconia mesostructure with a precision-milled titanium base, preserving a titanium-to-titanium connection at the implant platform while the zirconia above it carries the esthetic and biological properties that matter at and above the tissue.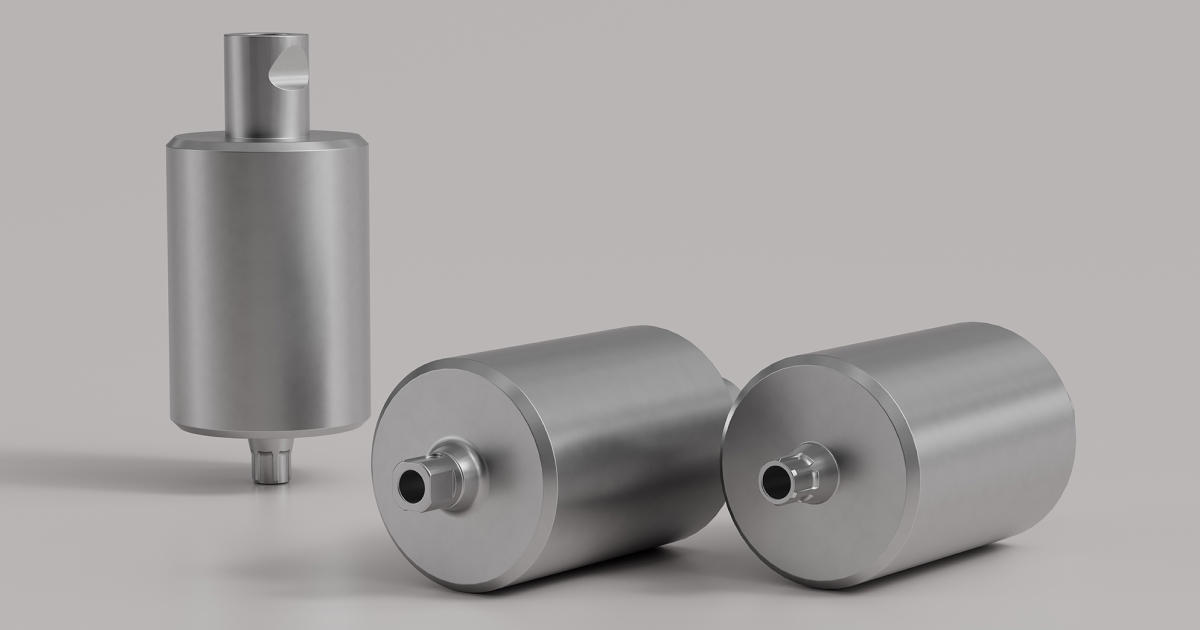
Soft tissue management and the emergence profile as design decisions
A natural tooth does not rise straight out of the gingiva. It tapers and contours through a cuff of soft tissue with a specific circumferential relationship, and reproducing that geometry is a design decision made at the CAD stage, not a property that follows automatically from calling a part "custom." Over-contouring the abutment places pressure on the tissue, which blanches and then recedes over time; under-contouring leaves a gap that traps food and plaque. A custom-fabricated abutment, built from accurate scan data of the patient's actual tissue contour, gives the designer the information needed to land between those two failure modes at every point around the abutment, rather than approximating it.
This is also where the workflow decision about margin depth connects directly to tissue and infection risk. A retrospective analysis of 129 implants found peri-implant disease present in 85% of implants with residual cement remaining at the margin, compared with 30% of implants without cement remnants and 1.08% of screw-retained controls with no cement involved at all.1 Because a custom design sets the margin depth deliberately, rather than inheriting whatever depth a stock shape happens to produce, it gives the clinician a margin that stays reachable and cleanable at delivery, which is what keeps that risk manageable in a cement-retained case.
Esthetic predictability and passive fit as workflow outcomes
Predictability in the esthetic result traces back to the same principle: a contour and margin decided deliberately in CAD, against real anatomy, produces a result the clinician can anticipate before the part is seated, rather than one that depends on how well a preset shape happens to match the case. That is a different claim than saying custom abutments simply look better. The design stage removes a layer of uncertainty about how the final crown emergence will read at try-in, which is what makes the esthetic outcome predictable rather than a matter of chance once the tissue heals around it.
Recent clinical evidence bears that reasoning out, at least in the specific case type tested so far. A randomized trial of 48 patients receiving immediate implants in anterior extraction sockets found a Pink Esthetic Score of 12.21 ± 0.35 for customized CAD/CAM titanium abutments against 10.41 ± 1.17 for stock titanium abutments at twelve months, alongside less crestal bone loss (1.75 mm versus 2.33 mm) and shallower probing depths in the custom group.2 That advantage does not hold up as a blanket rule across every study design, though. Pooling three randomized trials and three controlled trials across 230 patients with twelve to thirty-six months of follow-up, a systematic review found no statistically significant difference between prefabricated and customized abutments in midfacial mucosal recession, papilla fill, or Pink Esthetic Score.3
The two results are less contradictory than they look side by side: the randomized trial isolated a demanding case type, immediate placement into a fresh socket, where a custom design has the most anatomy to control for, while the pooled review spans a broader mix of case types and abutment designs where that advantage is harder to isolate. Read together, they support choosing between custom and stock based on how much the case's anatomy actually needs controlling, rather than treating a custom design as a guaranteed esthetic upgrade in every situation.
Passive, accurate fit follows a similar logic on the mechanical side. The implant-abutment interface is manufactured to a tolerance measured in microns, and testing across 20 titanium and 20 zirconia implant-abutment units found average interface gaps of 12.38 μm for titanium and 5.25 μm for zirconia, with bacterial leakage detected in every specimen regardless of material or the torque value applied.4 A custom abutment designed against a validated CAD library and milled from a pre-milled blank, matched precisely to the implant connection geometry, keeps the interface gap within the tolerance the connection was designed for. A part built from an unvalidated or approximated digital library can miss that tolerance even when the visible contour looks correct, which is why the CAD library behind the workflow matters as much as the mill producing the part.
Clinical indications that call for a custom-fabricated abutment
The decision to move from a stock abutment to a custom-fabricated abutment comes down to a small set of case features, each of which increases how much control over margin, contour, and angulation the case actually needs. An anterior position with a high smile line or a thin gingival biotype raises the esthetic stakes of every millimeter of contour. An implant placed at a compromised angle needs the restorative platform corrected without pushing the screw access channel through the facial surface of the crown. A multi-unit case needs emergence profiles that read as a continuous, coordinated line across adjacent implants rather than as isolated shapes. A cement-retained restoration needs a margin the clinician can actually reach and clean. A history of peri-implant inflammation in that patient raises the cost of getting any of the above wrong a second time. Immediate placement into a fresh extraction socket adds a further layer of unpredictability to both the gingival margin position and the emergence profile, which is the specific case type where the clinical evidence discussed above showed the clearest separation between custom and stock outcomes.2
None of this implies a stock abutment is a compromise choice by default. A straightforward posterior case with thick keratinized tissue and an implant sitting centrally in the restorative envelope is served well, and efficiently, by a preset part, and the added design and production time of a custom-fabricated abutment would not change the outcome enough to justify it. The decision runs in both directions, case by case, rather than defaulting to the more elaborate workflow as a general upgrade.
Coordinating the workflow between clinic and lab
A custom-fabricated abutment depends on the clinical and technical sides of the case working from the same information. The clinic supplies accurate implant-position data and a clear picture of the tissue and esthetic goals for the case, generally through a scan or a well-executed conventional impression. The lab then needs a digital workflow built on CAD libraries that match the physical hardware exactly, since a design generated against an inaccurate library will not seat correctly no matter how precisely it is milled afterward. Validated, manufacturer-matched CAD libraries close that gap between the digital design and the physical connection the part is ultimately milled to fit.
That coordination becomes more demanding, not less, as the number of implant systems in a lab's caseload grows. A single lab may be designing case files against several different connection geometries in the same week, each requiring its own validated library and its own set of manufacturing tolerances at the mill. Treating the CAD library as a fixed input, checked once and never revisited, is where digital workflows tend to drift out of tolerance over time, even when every other step in the process is executed correctly.
Matching custom or stock to the case
None of the workflow, material, or indication questions above resolve in isolation. A case with a thin biotype but a straightforward, well-aligned implant may need the emergence control of a custom design without needing the angulation correction that another anterior case requires. A posterior molar with a slightly off-axis implant may be served by an angled stock abutment without needing the point-by-point margin control a custom design would add. Treating "custom fabrication" as a single yes-or-no decision skips over the part of the workflow that actually determines whether the extra design and production time pays off in the finished restoration.
The more useful question at the planning stage is which specific feature of the case, margin irregularity, angulation, coordinated multi-unit contour, or esthetic risk in a thin biotype, is driving the need for added control, and then choosing between custom and stock based on that feature specifically. A lab and clinic working from validated CAD libraries and a shared understanding of the case's actual demands can make that match deliberately, rather than defaulting to whichever workflow happens to be the lab's standard offering. Whether that ends in a custom fabricated abutment or a stock abutment, the decision should follow the case's anatomy rather than a blanket rule.
Frequently asked questions
How does margin control differ between a fully custom CAD design and a reshaped stock or pre-milled abutment?
A fully custom CAD design, milled from a pre-milled blank, sets margin depth independently at every point around the abutment's circumference, following the tissue scallop directly. A stock or pre-milled abutment can have its margin adjusted and its angulation corrected within its starting geometry, but it does not offer the same point-by-point control across an irregular contour.
Which design decisions are made at the CAD stage of a custom-fabricated abutment?
The designer sets margin position around the full circumference of the abutment, shapes the emergence profile against the recorded tissue contour, and corrects the angulation of the restorative platform where the implant sits off the ideal axis for the crown. Material is confirmed at the same stage, since the CAM software needs to know which blank it is cutting from.
How much angulation can a custom fabricated abutment correct compared with a stock abutment?
A custom abutment corrects angulation as part of the same CAD process that sets margin and contour, so the practical limit is largely the screw access channel and available restorative space. A stock abutment is limited to the preset angles it is manufactured in, plus whatever reshaping its geometry allows.
Why does a lab working across several implant systems need to revisit its CAD libraries?
Each implant system has its own connection geometry, so a lab designing against several systems in the same week needs a validated library and its own manufacturing tolerances for each one. Treating the library as a fixed input, checked once and never revisited, is where digital workflows tend to drift out of tolerance over time.
Can a conventional impression replace an intraoral scan at the start of a custom abutment workflow?
A well-executed conventional impression remains a valid way to record implant position at the front of the workflow. What changes between digital and analog capture is how the position gets recorded, not what the CAD design and CAM milling stages then do with that data to produce the finished abutment.
When does a multi-unit case specifically require custom abutments rather than stock components?
A multi-unit case needs emergence profiles that read as a coordinated, continuous line across adjacent implants, which is difficult to achieve when each stock abutment starts from the same preset shape. Custom abutments let the lab design the contour of each abutment against its neighbors from the outset.
Does the specific transmucosal contour of a custom abutment change peri-implant outcomes on its own?
Not necessarily. A randomized trial comparing two custom zirconia abutment morphologies, a concave transmucosal profile against a linear divergent one, found no significant difference between them in mid-facial mucosal position, soft tissue thickness, or marginal bone level at twelve months.5 Customization itself, rather than the specific contour variant chosen, appears to account for most of the clinical effect.
References
- Linkevicius T, Puisys A, Vindasiute E, Linkeviciene L, Apse P. Does residual cement around implant-supported restorations cause peri-implant disease? A retrospective case analysis. Clin Oral Implants Res. 2013;24(11):1179-1184. doi:10.1111/j.1600-0501.2012.02570.x. pubmed.ncbi.nlm.nih.gov/22882700
- Robaian A, Hamed MM, Ahmed Y, Hassanein FEA. Comparative evaluation of customized CAD/CAM vs. stock titanium abutments for immediate implant placement in class II extraction sockets: a randomized controlled trial. Dent J (Basel). 2025;13(8):371. doi:10.3390/dj13080371. pmc.ncbi.nlm.nih.gov/articles/PMC12385633
- Lops D, Romeo E, Mensi M, Troiano G, Zhurakivska K, Del Fabbro M, Palazzolo A. CAD/CAM abutments in the esthetic zone: a systematic review and meta-analysis of soft tissue stability. J Clin Med. 2023;12(11):3847. doi:10.3390/jcm12113847. pmc.ncbi.nlm.nih.gov/articles/PMC10253332
- Smith NA, Turkyilmaz I. Evaluation of the sealing capability of implants to titanium and zirconia abutments against Porphyromonas gingivalis, Prevotella intermedia, and Fusobacterium nucleatum under different screw torque values. J Prosthet Dent. 2014;112(3):561-567. doi:10.1016/j.prosdent.2013.11.010. pubmed.ncbi.nlm.nih.gov/24656409
- Barwacz CA, Swenson M, Couso-Queiruga E, Comnick C, Xie XJ, Avila-Ortiz G. Effect of CAD/CAM abutment morphology on the outcomes of implant therapy: a randomized controlled trial. Clin Oral Implants Res. 2025;36(3):374-385. doi:10.1111/clr.14389. pmc.ncbi.nlm.nih.gov/articles/PMC11891029
Author
Bayardo Garcia, MPH
Product Manager · Digital Solutions
Drawing on more than 15 years of experience in dental technology, digital dentistry, and healthcare, Bayardo Garcia serves as Product Manager Digital Solutions for IPD Dental Group USA. He specializes in digital workflow integration, CAD/CAM technologies, and clinical support, helping dental practices and laboratories successfully implement IPD's digital solutions. He focuses on optimizing digital workflows, providing technical guidance, and supporting client onboarding and training to ensure the effective adoption of advanced dental technologies.
Share this content